Tag: malware analysis

Extracting Malware from Memory with Hollows_Hunter

Extracting Malware from Memory with Hollows_Hunter

Sometimes I come across a tool that makes me stop and think what I have been doing all my life life without it. This is how I feel about hollows_hunter. Hollows_hunter is essentially a tool for automatic extraction of evil objects and malicious code from memory. The tool is able to hunt for things such as process injection and replacement, process hollowing, DLL injection, malicious shellcode, and has a host of other uses. Hollows_hunter is based on pe-sieve, written by the same author, hasherezade.

Once a malicious object is found in memory (for example, malicious code in a running process), the tool will auto-magically extract the process from memory, and attempt to rebuild the headers and Import Address Table (IAT). In many cases, the tool is able to completely fix up the dumped file and rebuild the IAT so I could load it into IDA for further analysis. This is great because some of the malware samples I attempt to unpack and extract end up as warped shells of their once-glorious selves, un-analyzable in IDA. Hollows_hunter has saved me a lot of time recently, and seems to not get as much attention as it deserves. This drove me to write a quick tutorial post for it.

Let’s dive into hollows_hunter to see why it is so useful. Hollows_hunter gives a wealth of options that we can enable to help us better extract the data we are looking for:

hollows_hunter command line parameters.

For the following post, I’ll be using the sample with the SHA256 hash:

f8d281ee13bd7bde9b236a21966e7868836c452f1b2b10ad7c6dd1c395fbf149

You can find this file on VirusTotal or elsewhere online, in case you want to follow along.

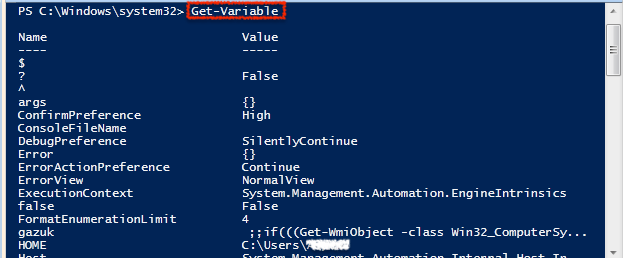
First, I’m going to run the sample in a Windows 7 VM sandbox. Immediately after executing the sample, I run hollows_hunter:

Running hollows_hunter.

The command line options I used above are “hooks”, “shellc”, “data”, and “imp”.

  • “hooks” essentially tells hollows_hunter to look for malicious hooks and patches in memory.
  • shellc” instructs the tool to look for shellcode (this sometimes produces false-positives, so handle with care.)
  • data” tells hollows_hunter to inspect non-executable memory segments. This is sometimes important because malware may write data to non-executable areas of memory. This data may be useful strings, or it may be code that the malware will later try to execute.
  • Finally, “imp 1” instructs hollows_hunter to attempt an automated rebuild of the Import Address Table (IAT). This is super helpful, as we will see in a minute.

I ran hollows_hunter as Administrator so that it can scan system processes. I could have also ran the sample with the parameter “loop”. This parameter instructs hollows_hunter to continually run on repeat, constantly looking for malicious activity.

After running hollows_hunter, we can see that it scanned all running processes, found some malicious activity in memory, and dumped those memory regions:

hollows_hunter summary.

PID 2892 and 2944 are, in my case, false positives. I know that because hollows_hunter seems to always detect malicious activity in svchost.exe and wmpnetwk.exe when running as an Administration. Powershell.exe (PID 2520) is the PowerShell process I am running hollows_hunter in, so this is also a false positive.

EDIT: After messing around with the latest version of HollowsHunter (HollowsHunter Portable 0.2.4), I have confirmed that the issues with most of these false positives have been fixed . Obviously, there will always be false positives with any tool, but @hasherezade did a great job at identifying the common FP’s.

We can see that the malware sample has spawned two strange processes (WhatsAppWeb.exe, PID 2480/2088), and hollows_hunter was able to dump those processes from memory.

If we navigate to the hollows_hunter directory that we ran the tool from, we can see new directories that match the name of the PID that was dumped. In my case, the directories I am interested in are “process_2480” and “process_2088”. Let’s see what hollows_hunter dumped for us in the “process_2480” directory:

hollows_hunter dumped process.

Here we can see the dumped executable from memory, the list of imports that the sample is likely utilizing, and a report of the findings in JSON format. Now let’s inspect the “WhatsAppWeb.exe” here. I will open this file in IDA, my disassembler of choice.

Interesting strings in "WhatsAppWeb.exe".

Looking at the strings, we can immediately see some of the capabilities of this malware sample. This sample seems to be utilizing keylogging functionalities, and possibly attempting to disable anti-virus software.

"WhatsAppWeb.exe" imports.

If we look at the Imports section, we can see all of the imports are listed here. This means that the IAT was successfully rebuilt! Rebuilding the IAT is always a huge pain in my %@$, so hollows_hunter really helped here!

Because the sample has been unpacked, the IAT and PE structure have been rebuilt, and the strings appear readable, this malware should be easy to analyze further in IDA. Whoot.

Analyzing "WhatsAppWeb.exe" in IDA.

Well, that’s all for now. I hope you learned a bit about the usefulness of hollows_hunter. Thanks to hasherezade for putting in the work to create such a useful tool!

If you enjoyed this post, follow me on Twitter (@d4rksystem) 🙂

Javascript Deobfuscation with Process Hacker

Javascript Deobfuscation with Process Hacker

I truly dislike Javascript-based malware. Deobfuscation of Javascript is, to me, annoying at best – and rage-inducing at worst. I love unpacking and analyzing PE executables, DLL’s, and the like, but I tend to avoid Javascript analysis when possible. However, in the world of malware, sometimes you must face your annoying, rage-inducing enemy in the face.

I have found that sometimes the fastest and simplest way to deobfuscate complex Javascript code is to simply run it in a Windows virtual machine using a JavaScript interpreter (such as the built-in wscript.exe), then dumping the memory of that process and directly extracting the deobfuscated code. I say “sometimes” because this techniques does not always work. I will explain why later.

Ok, let’s see how this could be done in practice.

I have downloaded a sample of WSHRAT, a Remote Access Trojan (RAT) written in Javascript. WSHRAT contains many interesting functionalities including keylogging, credentials stealing, and others. If you are interested in following along, here is the sample I used for this analysis.

https://www.virustotal.com/gui/file/f3f60c60e8f112bb0e2f04edb515a6984f9f148fcfd0871859c97fcd3c7a06b7/detection

Sorry – you must have a VirusTotal account capable of downloading the sample. But if you are resourceful, I’m sure you can find the sample elsewhere 😉

If we open the WSHRAT sample in a text editor, we can see that it contains a long obfuscated string in function “bgftrewas”. This string is actually obfuscated and encoded using several techniques. If you have time, you may be able to deobfuscated it manually.. But if you don’t have time, like me, you just want instant gratification 🙂 Let’s run the malware with the native Windows “wscript” Javascript interpreter and inspect the process memory!

WSHRAT Javascript code.
Obfuscated function.

Before we get started, it is important to note that this technique does not work for all Javascript code. In this particular case, WSHRAT is a “standalone” .js file and will run natively in Windows. Some Javascript code requires the context of a browser, PDF file, or other external contexts. You may be able to use this technique for even these, however your mileage may vary..

Double-clicking the .js file in Windows 7 will launch the file in wscript.exe. Other versions of Windows may use a different interpreter, but it shouldn’t be much different than what I describe here.

Next, open a tool such as Process Hacker or Process Explorer. Any tool that allows the viewing of processes and dumping the memory of said processes will work. Process Hacker is my go-to tool so I will demonstrate that in this blog post. If you inspect the running processes with Process Hacker, you will see two instances of wscript.exe running. This is the Javascript malware.

Choose the wscript process utilizing the most memory, right click on it, and select “Properties”. Then select the “Memory” tab – this will display the memory allocated to the wscript process. Finally, selecting “Strings” will display all strings in the current allocated memory. Select a string length of about 1000 bytes. This will allow us to quickly view the most interesting strings in the memory.

Now we can see a nice list of strings and code in the current memory of the wscript process.

Most of these strings are not helpful. The trick is to find the deobfuscated code in memory. Hint: Look for interesting functions and variables that were once obfuscated but are now readable. The strings in the image above hint that this may be the deobfuscated code. We can see in this image that the memory address of these strings is at offset 0x4cc3710 (it may be different on your machine if you are following along!). We could dump the code directly from the Strings window, but there is a better way to do it.

If we close the Strings windows and go back to the Memory window, we can located the entire memory region in which the deobfuscated Javascript code may reside. In my case, this memory region is 0x4ca0000, which contains the memory region we identified above (0x4cc3710). Right-click on the memory region we want to dump, and select “Save”. Then save this memory dump to a file.

After we dump the memory to a file, open the file in a text editor. There will be some unreadable content, but we will eventually find the deobfuscated Javascript code in the file! Sometimes the code may be spread across multiple memory regions, so you may need to dump multiple memory regions in order to find the entire deobfuscated malicious code. In the case of WSHRAT, however, most of the important code is in the memory segment we dumped earlier.

I hope you can use these techniques in the future when analyzing Javascript. Happy deobfuscation 🙂 If you enjoyed this post, follow me on Twitter (@d4rksystem)!

Malware Analysis in 5-Minutes: Deobfuscating PowerShell Scripts

Malware Analysis in 5-Minutes: Deobfuscating PowerShell Scripts

I often run into obfuscated PowerShell while analyzing malicious documents and executables. Malware authors have many reasons for obfuscating their PowerShell activities, but mostly they do it to tick me off for the lulz.

There are a few good ways (and many bad ways) to tear apart PowerShell scripts and discover what they are doing under the hood, but today we’ll be focusing on a quick and easy one – because quick and easy is always best. Right? Yes. Ok, let’s get started.

For this demonstration, I’ll be using a Windows 7 VM and PowerShell ISE, which is installed on most Windows 7 builds.

Below, we have a PowerShell script that I extracted from a Microsoft Word document.

PowerShell script.
PowerShell script.

The PowerShell script was embedded in the MS Word document and would be executed if a user opens the document and clicks the “Enable Macros” button. Most users wouldn’t have an issue with this, and would happily click this button to make this annoying security popup go away. I understand, dear user. Security is hard.

Now, there are a few ways we can approach this script:

  1. We can stare at it for 15 minutes while crying into our Scotch. I tried this, and the script was still obfuscated.
  2. We can deobfuscate it by hand, working through the math on a nice sheet of paper. Your mathematics professor would be proud.
  3. We can take this code into the PowerShell ISE built into Windows, run it, and dump the variables. I will be focusing on Option 3 for the remainder of this blog post.

As I mention previously, the goal here is to deobfuscate this PowerShell script in the easiest, quickest way possible. The most effective way to do this it to simply run the PowerShell script in the PowerShell ISE, and then dump all variables from memory. This will allow us to quickly see what the script is doing with minimal effort. As a warning, if you are doing this at home (or, God forbid, at work), this will infect your system, so ensure you are using a VM or a system you don’t care too much about.

Below, you will see that I copied and pasted the PowerShell script into the Powershell ISE in Windows 7, and also removed the “powershell.exe” and beginning parameters from the script. All we need is the script code itself. Ok, let’s run the script, and then dump variables from memory.

PowerShell ISE
PowerShell ISE.

After running, to dump variables, simply use the command Get-Variable in the console after the script has finished running.

Get-Variable command output.

Most of the variables that are displayed here are of little interest to us. Let’s focus on the variables that were actually referenced in the script. These variables likely contain the deobfuscated PowerShell code, and can be seen below:

Interesting variables...
Interesting variables…

Variable “hyvbx” contains a “;”. Wow. Profound. We can skip this one because obviously it’s not that important.

Variable “gazuk” seems like it contains something a lot more interesting. Let’s dump the complete contents of that variable using the command Write-Output $variable_name;.

Variable output.
Variable output.

Now, that’s better. Here we clearly have the deobfuscated PowerShell commands!

If we analyze this further, we can see that the script is looking to see if our analysis environment is running virtualization software such as Vmware, VirtualBox, or KVM. It is also checking to see what country we are located in. If the system passes these checks, the script will execute, and will attempt to download a javascript file and executable from various web servers and run them. I won’t go into additional detail on this specific malware or what it is downloading, as that is not in the scope of this post.

Deobfuscated PowerShell!

Congratulations on successfully deobfusctating a PowerShell script the easy way! Keep in mind that this will not always work, and you may need to create breakpoints in the Powershell ISE in order to step though the code. This technique, however, works in many cases.

If you enjoyed this post, follow me on Twitter (@d4rksystem) 🙂

Thanks for reading.